Images
Work instruction image editor
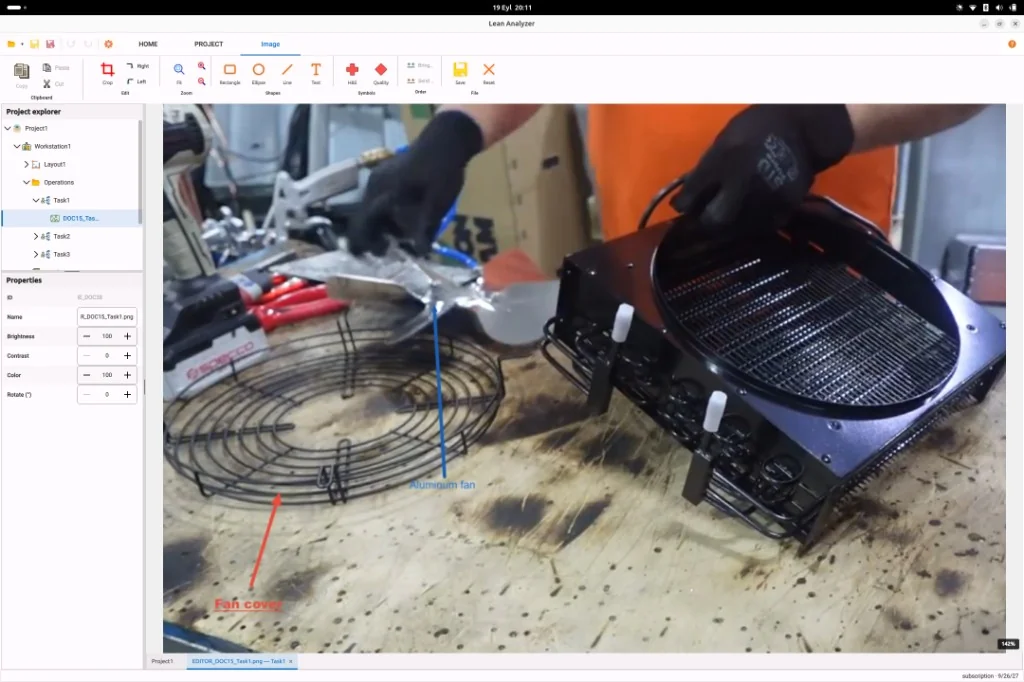
A usable shop-floor picture is cropped, numbered, and marked — not a raw photo from the aisle. Edit it in the same app as the instruction.
Pictures that do not teach
Work instructions fail when the photo is dark, too wide, or missing the grip. Jumping to a separate graphics tool breaks the link to the operation and slows every update.
- The important motion is a small corner of a wide shot
- Arrows and numbers live in a different file from the step
- Quality checks and hazards are described in text only
- Each restudy means hunting for the original screenshot
How it works
From the floor to a usable study
-
1
Start from the study picture
Use a frame or photo that already belongs to the operation you timed.
-
2
Crop to the motion
Keep what the operator must see: hands, part orientation, fixture, or gauge.
-
3
Mark what matters
Add the arrows, numbers, and labels your plant already uses on standard work.
-
4
Put it on the step
The picture stays with the instruction. When the method changes, you edit the same asset instead of starting over.
What you get
Outputs you can take to the team

One visual per step
Readable at a glance on a noisy line, not a collage of three photos.
Callouts on the work
Grip, orientation, hazard, or quality check marked on the image.
No extra graphics package
Stay inside Lean Analyzer so the picture never detaches from the operation.

Ready for the sheet
The same image is what operators will see on the printed or shared instruction.
Built for standard work, not design
You need crops and marks, not a full illustration suite. The editor is intentionally simple so industrial engineers and team leaders can finish a sheet without waiting on a graphics queue.
Together with the study
Images come from the work you timed. That keeps the sheet honest when the fixture changes and you restudy the job.
FAQ
Questions, answered
Study the work on the workstation
First month free. Desktop app. Cancel anytime.